DIY Tips for Installing Doors and Windows
by: Dale Cox
Pre-hung doors and windows of just about any size are available for both interior and exterior purposes. These comes with the jamb and the trim molding already assembled so all that is required is to open the wall, adjust the framing to the proper size and slide the new unit into place. Using one of these will make adding a new opening simpler and a pre-hung unit will have jamb measurements printed on the packaging to make building the frame easier.
How to Install a Pre-Hung Door
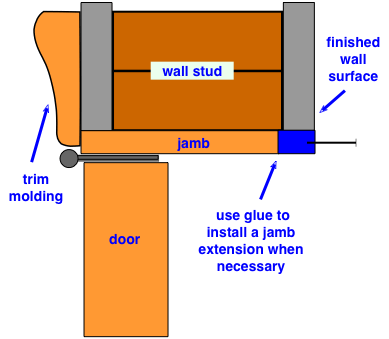
Remove the trim molding from both sides of the jamb but don't remove any nails, screws or other device holding the door stationary within the jamb. Slide the unit into place and set it flush with the surrounding wallboard on the hinged-side of the door. Be sure the trim molding will lay flat against the wall and jamb when installed. Check the other side of the wall and if the jamb isn't flush there also, install a jamb extension to build it out. Use carpenter's glue between the jamb and extension to help blend the two pieces of wood without a visible seam. After the glue has dried, sand the seam to remove any roughness before finishing with paint.
How to Install a Pre-Hung Window
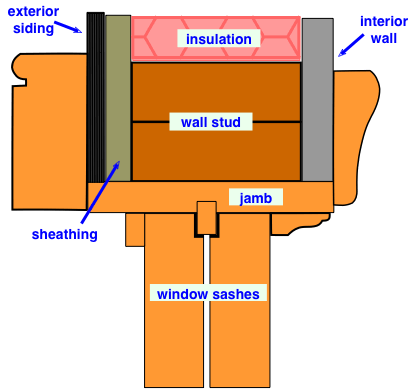
Remove the interior and exterior trim molding but leave the stabilizer keeping the window sash in place until installation is complete.
Install a window from the outside of the house. Set the jamb flush with the exterior siding and add a jamb extension on the inside if necessary. Nail furring strips or similar boards to the exterior siding, across the window opening, and press the new window jamb firmly against them to keep the unit flush while completing the installation.
Shim the Jamb
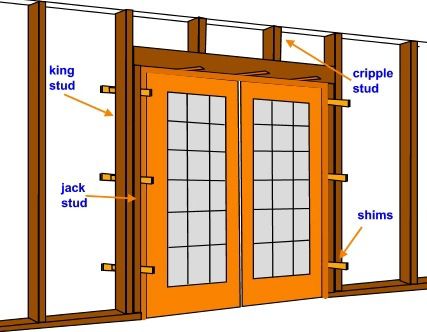
Slide shims between the jamb and jack studs to hold the unit in place. Drive the shims from each side of the wall to form pairs around the frame.
For doors, place the shims near the hinges and every 12 inches or so along the header. Space shim pairs about every 12 inches around a window jamb as well as along the header and sill.
Make the Unit Plumb
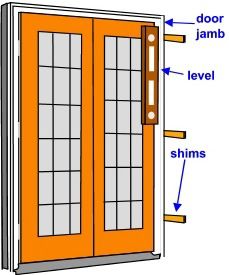
Adjust the unit until it is plumb and flush inside the jamb. Hold a level against the side and adjust the jamb until the centered bubble indicates the unit is plumb. Check the unit face and make sure this plane is plumb as well. Avoid causing the jamb board to bow by forcing the shims too far into the gap, they should be snug but not jammed in the space.
Check the Door Reveal
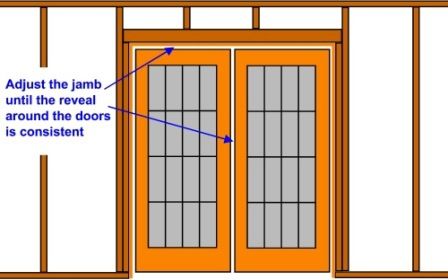
Also, check that the door or window is square in the jamb with a consistent space (reveal) around all the moving parts. Reposition the shims to adjust the reveal if necessary.
Drive 3 inch finishing nails through the jamb, the shims, and into the wall studs to secure the unit in place. Space nails at 12 inch intervals around the jamb. When it's secure, use a handsaw to cut the shims off flush with the wallboard and siding. Remove any pre-hung stabilizer holding the moving parts in place and make sure the unit functions properly. Re-attach the moldings that were removed earlier to finish the installation.
 Framing for a Window
 Framing for a Door