Guide to Wood Trim Moldings
by: Dale Cox
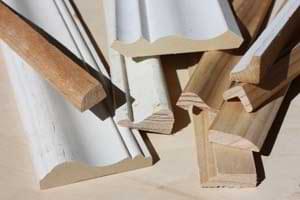
Installing decorative trim molding is one of the quickest and easiest ways to improve the appearance of a room. This can be a simple one-piece, shaped board or it can be an elaborate design made by combining multiple trim profiles and finished lumber.
This page contains information on the types of molding you will find at home stores and lumberyards as well as several examples of common profiles you can use alone or in combination for building baseboards, door and window casings, chair rails, and crown.
Stain-Grade vs Paint-Grade Trim Molding
The examples pictured on this page include a couple of different grades, these are usually referred to as stain-grade and paint-grade moldings. The grade to choose will depend on where it will be installed, whether you want paint or natural wood, and how much money you want to spend.
Stain-grade or solid wood moldings are much more expensive than paint-grade and are often reserved for crown, mantels, and staircases where a natural wood finish can add dimension and interest to a room. Moldings that dominate a room like door casings, window casings, chair rails, and baseboards are usually done with paint-grade so they can be finished with a color that will accent the walls. This keeps things looking brighter than with natural wood that can be dark and absorb much of the light in a room.
About Stain-Grade Molding
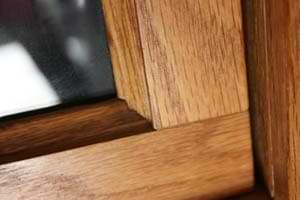
Wood is considered stain-grade or suitable for a clear finish if it is solid and of top quality with no seams and few if any knots or other blemishes. Because the wood will show through the finish, any imperfections like this would be very noticeable. Hardwoods are most often used to make stain-grade trim, with oak being the most popular and available at home stores. These may be finished with a pigmented stain followed by a clear varnish, or a clear coat can be used alone to bring out the natural beauty of the wood.
Because of the irregular grain in some hardwoods like oak, stain is often used to change the appearance of the wood before varnish is applied. An exception to this is red oak because of its rich natural color, it is often left natural and finished with varnish alone, producing a reddish-brown color that goes well with most room décor. Red oak also takes a stain well but because it has an open grain the finish will have light and dark areas that can be distracting to some. In these cases, a hardwood with a closed grain like walnut or maple is a better choice.
Not all hardwoods are used for stain-grade molding, poplar is one commonly used for custom milled paint-grade molding because it holds an edge well and has a very smooth, hard finish when painted. The grain color of poplar can vary greatly, even in the same piece, making it unsuitable for a stain or clear coat unless the pieces are chosen carefully to get a uniform finish.
With the exception of poplar, hardwoods are typically harder than softwoods and will require carbide saw blades for cutting and shaping. Drilling pilot holes is a must when fastening with nails unless a nail gun is used. A nail gun will drive and sink the fasteners perfectly with the pull of a trigger, which can be a huge help with a big molding job on your hands.
About Paint-Grade Molding
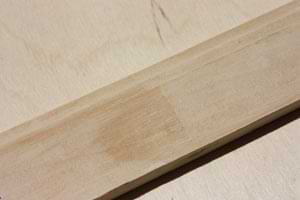
Paint-grade molding is much cheaper than stain-grade and may be made of wood or one of several synthetic materials. Wood can be solid pieces or it may be manufactured by gluing short pieces together with finger-joints. This manufactured trim is usually pre-primed to make finishing easier but you will also find unfinished boards with visible finger joints. These boards are left bare allowing for a paint or stain finish depending on user preference.
Softwoods including fir, hemlock, and pine are most often used to make paint-grade molding, with pine easily the most common because it grows quickly on tree farms and is a very renewable source of raw material. Softwood is very easy to cut by hand with steel saw blades and can be fastened with hammer and nails. It sands easily and planes very smooth which produces a uniform finish when primed and painted. While softwoods are indeed soft and easily dented, the lower price for a paint-grade can easily make up for this flaw.
In addition to softwoods, synthetic materials are used to make paint-grade molding by pressing a profile into plaster, medium density fiberboard (MDF) or plastics like polystyrene and polyurethane. Of these, MDF is probably the most widely available for all types of room trim. Plastics are often used to make easy to install ornate crown and cornice pieces but plastic door and window casing are also commonly found in home stores. Plaster is used mostly for medallions to go around ceiling light fixtures but plastic medallions can also be found in the mix.
Common Molding Profiles
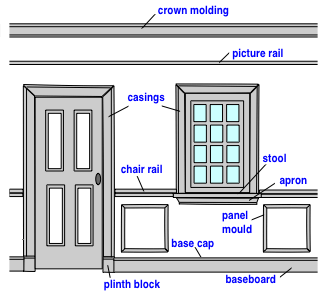
This diagram identifies the most common moldings you will find in the average home. Some, or all of these may be used in the same room but in smaller spaces they should be kept to a minimum or the décor can become too busy.
In larger rooms with high ceilings where the wall space can accommodate more decoration wall frames, picture rails, and crown moldings can be essential to warming the décor. Around large doors, a plinth block can help to transition between wider door casings and baseboards.
Building a Combination Profile
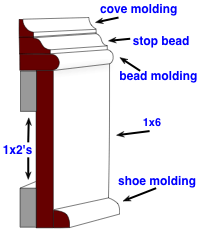
In addition to the simple profiles pictured on this page, an original and elaborate design can be created using two or more pieces in combination. This may be necessary to match an existing profile or you may wish to have a unique trim design for your room.
Building combination molding like the baseboard pictured here doesn't have to be hard or complicated. Each piece is cut and installed, one on top of the other to build up this profile.
This baseboard features 3 small pieces stacked on top of a 1x6 and a piece of shoe mould along the floor. Small 1by strips behind the finish board push the face of the trim out making it suitable for mating with thick door casings like those found in Victorian style trim. This is just one design possibility, many others can be built using a little imagination and the stock moldings pictured in the alphabetical listing below.

Back Band:
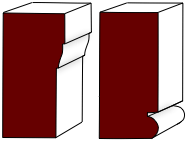
Use this to wrap the square side on one-piece baseboard and casings to create a wider profile with two decorated edges. This is also used for capping on wainscot and edging on paneling and builtin shelves. A custom back band can be made by cutting a rabbet along the back of a piece of base cap if the desired profile isn't available.

Baseboard:
Used to trim between a wall and finished flooring. A decorative edge is cut in the top of the one-piece baseboard pictured here. These are quick and easy to install and can also be used in combination with a back band to build door and window casings or as a backer board for crown and cornices. Baseboards range from about 2½ inches up to 8 or 10 inches and should be chosen based on the size of a room and ceiling height, using smaller pieces for average sized rooms and larger pieces for rooms with high ceilings.
see more one-piece baseboards

Base Cap:
To build a baseboard use base cap like this to trim the top of a piece of 1by finish lumber. Use a piece of shoe mould, pictured below, to trim along the floor edge. As with most pieces this profile is available in larger pieces for other applications.
see more base caps
Brick Mould:
This thick piece is commonly used to finish around openings on the exterior of a house, it's made to fit next to brick walls as a finished edge and transition to doors and windows. Also, try using this piece in large rooms to build a stacked crown or cornice.

Bullnose:
Usually 3/4 or 1 inch thick in various sizes with one rounded and one squared edge, commonly used to finish the edge of tongue and groove flooring but also works well to top a chair rail or as beading in other combination designs.
Casings:
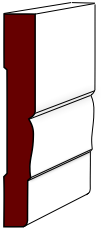
Used to decorate and cover the gap between jambs and the wallboard around doors and windows these are the most visible trim in a room. Several one-piece casings are available or a unique can be built.
see more one-piece casings

Chair Rail:
Installed along the mid-point of a wall at about 32 inches from the floor and used to protect the wall from scratches caused by chairs placed too close. This is usually a feature of dining rooms but can also be found in just about any room of the house. This too is available in one piece or it can be custom built.
see more one-piece chair rails

Corner Bead:
Used to protect outside wall corners preventing plaster chipping at vulnerable edges. Also used to finish outside corners on wall paneling. When used to wrap the outer edge of a 1x4 or 1x6, this corner bead works well to create custom casings also.

Cove:
Sometimes used as a simple crown between walls and ceilings in small rooms but most often these are used in combination with other profiles to build custom designs. These are also handy for finishing the right angle inside corners when installing paneling and other sheet wall coverings.
Crown:
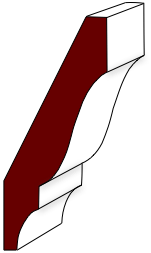
Used to trim the right angle formed between walls and ceilings. This one-piece design can be used alone or in combination with other profiles to created an original crown or cornice design.
see more crown profiles

Dentil:
A thin strip with regularly spaced rectangular cut-outs resembling a row of teeth, this trim can be installed below a crown profile for a traditional design or try stacking it in combination with a back band, cove, base cap or other small piece to build interesting door and window casings or chair rails.

Half-Round:
Used to finish edges on plywood and other sheet goods when making shelving and other case work. Also used to build custom crown, chair rail, and casing.

Panel Mould:
Use these small pieces to build wall frames under wainscoting and on high ceilings in large rooms. These are also commonly used to decorate cabinetry, furniture, crowns, and cornices.

Picture Rail:
Small pieces installed horizontally, several inches down from the ceiling and used to support hooks for hanging artwork on old plaster walls. This eliminates the need for nails and picture hooks that can easily crack brittle plaster.

Rake Mould:
Also called solid crown, these pieces also work well as base cap, stop bead or shoe molding. Try cutting a rabbet along the back to create custom back band.
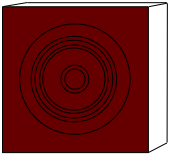
Rosette:
Used at the top of door and window casings to form corners using butt joints instead of miters. Also a good choice on corners on ceiling frames.

Screen Mould:
A thin band traditionally used on porch and window screens. Commonly available in 3|4 inch widths making it convenient for banding to finish the edge on plywood and other sheet goods when making shelve and cabinets.

Shoe Mould:
A small, pliable molding used to cover the small gap between baseboards and floors. The pliable nature of the strips makes it useful for hiding irregular flooring. Shoe mould found at home stores is a quarter round piece milled with one flat edge wider than the other. Install these with the shorter edge against the floor and the wider edge on the vertical.

Stop Bead:
Used at the stop point for a swinging door or along the edge of a window sash to keep on track. These are also handy for backer boards on crown and chair rails.

Threshold Saddle:
Use this in doorways to transition between two rooms with different types of flooring. Also useful for covering rough flooring when installing a new interior door. Use a flat saddle to blend the transition between wood and carpet or tile and carpet. Use a saddle with a shallow rabbet along one edge if there is a difference in floor height to even it out.
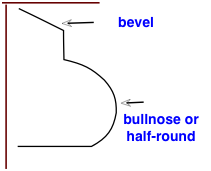
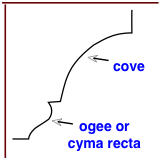
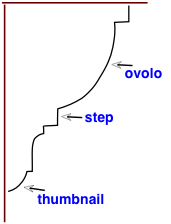
 Building Stacked Trim Molding