Repairing Drywall Nail Pops
by: Dale Cox
Nail pops occur in walls and ceilings when the nails or screws holding the wallboard to the framing become loose over time. This allows the wallboard to move and as a result the nail heads push through the surface and cause an unsightly blemish. To restore a smooth surface, the wallboard must be reattached with new drywall screws. Using the repair technique on this page, nail pops like this can be stabilized and the damage permanently repaired. Check here for a video demonstrating how to repair nail-pops.
What You'll Need
- Hammer
- Screw Driver
- Drywall Screws
- Joint Compound
- Drywall Joint Knife
- Mud Pan
- Sandpaper
#1 - Locate the Wall Framing
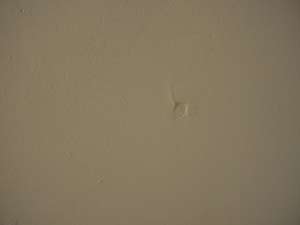
First, locate the wood framing behind the wallboard. For ceilings in particular, you need to know the direction the boards run to know where to add new fasteners. In many cases there will be several nail pops in a row indicating the layout of the ceiling joists or wall studs underneath. If you're only dealing with one or two nail pops, you'll have to try looking in an attic or other exposed area to determine the orientation of the framing.
Another method for locating the framing is to tap the wall or ceiling and listen for a difference in the sound produced. In general, a hollow sound indicates empty space behind the wall surface and a sharper sound indicates a joist or stud just underneath. The difference between the two sounds will give you a rough idea of the location of the framing. Using this method, you should be able to determine the layout of the framing and where to drive new screws.
Of course you can always make use of modern technology to locate joists and studs. There are many low and high tech devices made for just this purpose. As with most things, the low-tech options can be hit or miss. If you have the money, a high-tech stud finder can make locating wall and ceiling framing foolproof. However, unless you have other reasons to locate hidden wall framing, they probably aren't worth the trouble or money involved.
#2 - Reattach the Wallboard
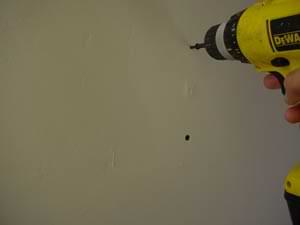
You can reattach the loose wallboard with a screwdriver in cases where only a few nail pops are involved. But if you have many nail pops to repair, a cordless drill-driver will save a lot of time and effort.
For each nail pop, drive two 1-5|8 inch drywall screws through the wallboard and into the framing. Place the new screws about 2 inches away and on both sides of the damage. Sink the screw heads slightly below the wall surface so they can be covered with joint compound later.
#3 - Dimple the Nail Pop
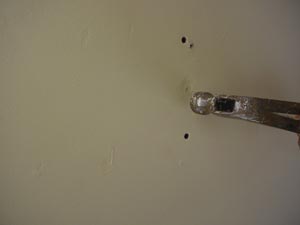
The best way to ensure that loose nails will not pop again is to remove them. However, if pulling the nails will cause more damage, sink the heads instead using a hammer to drive them well beneath the wall surface. If you're dealing with loose drywall screws, drive them back in using the screwdriver or screw gun.
In any case, "dimple" the damaged drywall surface over the pop using a hammer to crush the gypsum a bit. This will make a depression in the surface that can be filled with joint compound to cover the damage and level the surface. If this process creates chipping in the wall material over the old nail, remove the debris before filling it in.
If the wallboard around the nail pop is ragged or crumbling, remove all the damaged paper and gypsum using a sharp utility knife to cut it away. To be sure any exposed drywall paper won't pucker up and separate when the repair compound is applied, seal it with a shellac-based primer-sealer and let it dry for about an hour or so before proceeding with the repair.
#4 - Cover the Nail Pop with Joint Compound
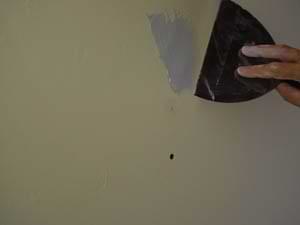
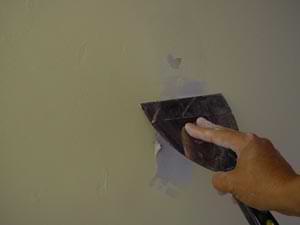
You can use setting-type or ready-mixed joint compound for this repair. The setting compound will dry faster and be harder when done but it must be mixed with water before using. Ready-mixed is easier but it takes longer to dry and will never be as hard as setting compound. If you have very deep holes to fill, use the setting compound to ensure a durable repair.
Use these instructions for mixing and handling joint compound, also called mud, and cover the pops and the new screw heads with a thick coat. Spread the mud to overflowing over the depressions and immediately skim off the excess using a joint knife held at about 30 degrees.
Press down hard enough with the blade to remove most of the mud while floating it over the depressions to level them. Try to leave only a thin coat on surrounding surfaces to avoid a lot of unnecessary sanding when you're done. Return the collected mud to the pan and move on to the next pop. When you're done, let the mud dry completely before proceeding.
It will take at least two and possibly three coats of mud to level and smooth out the dimples. Let the mud set and dry for about 30 minutes if you're using setting compound. If you're using ready-mixed, you'll have to wait longer to do a second coat. Depending on the depth of fill and humidity, it could take ready-mixed compound a couple hours or even a day to dry enough to proceed.
When you're ready to apply a second coat over the pops, scrape off any roughness in the surface first using upward strokes with the joint knife. Apply the second coat of mud spreading it thick first to completely cover the area and then skimming it off to level and smooth the surface. Again, remove any excess mud from the surrounding surface to keep things clean.
#5 - Sand and Touch Up Wall Paint
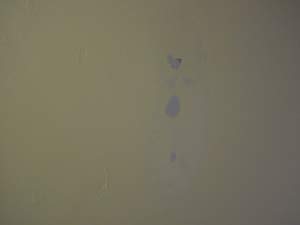
When the second coat is dry, examine the patch to determine if another is needed. If so, lightly sand the whole area with medium grit sandpaper and then gently wipe the dust away with a damp cloth.
Apply the third coat of mud going over the entire repair area at once. Work as before spreading a thick coat first and then skimming off the excess to smooth it out. When the final coat of mud is completely dry, lightly sand again to level the patch over the dimples and feather the edges into the surrounding surface.
To finish, brush away the sanding dust and lightly wipe off the residue with a damp rag. Touch up the paint using a flat latex paint. If the finish paint you're using is flat latex, you can use it to prime as well. If you're using semi-gloss or any other shiny paint, prime the mud work with a latex primer or any flat latex paint first and let it dry before applying the finish paint.
 Repair Drywall Paper