DIY Wood Joinery Techniques
by: Dale Cox
This page contains pictures and descriptions of the most common carpentry and wood joinery techniques used to build everything from walls to furniture. These techniques are often used in combination to join different parts of a project.
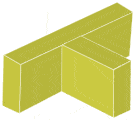
Butt Joint:
Two pieces of wood are cut square and glued or nailed end to face. This is the simplest and weakest of wood joints, wherever possible reinforce with screws or nails when using this technique. Best suited for rough construction projects such as a wall frame where a stud is butted to the top and soleplate.

Compound Miter:
Two pieces of wood are each cut with two mating angles, a bevel, and a miter. With this technique the wood is cut in two directions at once to form an offset union. This technique is used to join trim pieces such as crown molding or to make picture frames and shadow boxes. See the Compound Miter Saw Guide for more about this type of joint.
Crosscut:
When a board is cut across the grain it's referred to as a crosscut. Crosscutting is probably the most frequently used technique to cut boards and will be employed to make butt and lap joints. Conversely, cutting with the grain along the length of a board is called a rip cut.
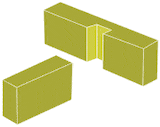
Dado:
A groove cut in a board, usually half way through, to accept another board that fits snuggly into the groove. This technique is used in furniture-making often for internal, support members to keep the finished piece stable while under stress from use.

Dovetail:
Two pieces of wood to be joined are each cut with small, dovetail-shaped mortises or tenons. One side of the joint is cut with a row of tenons and the other is cut with a row of mortises. The tenons fit snuggly into the mortises to complete the joint. In most cases, no other reinforcement such as glue is used. This is a very stable joint often used to join pieces for making drawers. Router bits and jigs are available for making these joints or they can be cut by hand with a few simple angles.
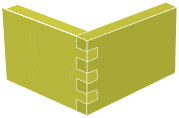
Finger Joint:
This is another technique for joining the sides of drawers and other similar applications. Here, the ends are cut with the same sized mortise and tenon pieces and glue is used to hold the pieces together.
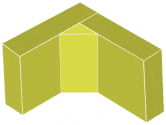
Glued-Block Butt Joint:
This is the same as the basic butt joint above but with the addition of a triangle block glued to the inside for reinforcement. This technique is used frequently for table tops and chair seats when building furniture to keep those joints square while under stress from use.
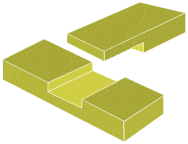
Lapped Joint:
A simple form of this technique is a face to face union of two pieces of lumber. Alternately, one or both pieces can be cut to form a lapped joint. A half-lap joint is made when one of the mating pieces is cut and laid across the other uncut piece. A notched-lap (pictured here) is made when each piece is cut to remove half its thickness, creating two mating pieces. Glue is applied to the two notches which are then overlapped and clamped until dry. Often screws are added to this joint to improve strength.
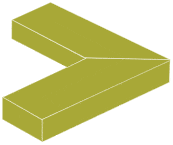
Miter:
Here two pieces of wood are each cut at complementary angles. For example, two 45° angles are joined to create a 90° union for building a frame or box. To join two boards at any angle with a miter joint, divide the angle by 2. For example, to joint boards at an angle of 140°, cut each at 70°.
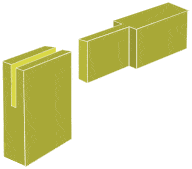
Mortise and Tenon:
Used in finer furniture and cabinet construction when joining rails and stiles. With this technique, the end of one board, the rail, is cut to form a square peg or tenon. The other piece, the stile, is cut with a square hole, or mortise the same size as the tenon. A mortise and tenon joint is used to build many furniture pieces, raised-panel doors, frames for cabinet faces and more. A biscuit joiner makes a quick mortise and tenon although not a top quality one.
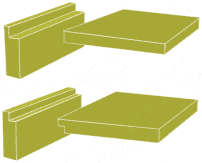
Rabbet:
This is a technique for making a modified butt joint with a notch cut in one, or both ends of the boards to be joined. This improves the strength of the union by increasing the surface contact area between the two pieces. This joint can be glued and clamped, or screws can be added for more strength.
With a simple rabbet, a notch is cut in one of the boards to accept the full thickness of the mating board. The notch can be cut to any depth but it's usually about half the thickness of the boards being used. With a double-rabbet join, both boards are cut with matching notches so they fit seamlessly together.
Rip Cut:
When a board or plywood sheet is cut with the grain along its length, it is referred to as ripping. Wood can be ripped using a table or circular saw. Using a table saw is the safest and easiest way to rip boards. Plywood is usually ripped using a circular saw with a board clamped to it to act as a fence for keeping the cut straight.
 Building Custom Trim Molding
 Building a Wide Stacked Cornice