How to Paint Kitchen Cabinets
by: Dale Cox
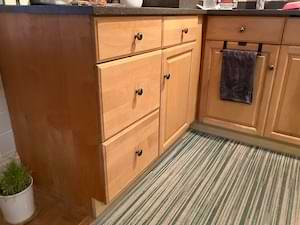
Painting cabinets can be a fast, inexpensive way to renew your kitchen and brighten it up. Just about any material used to make cabinets including metal and simulated wood, can be painted as long as the surface is cleaned and prepared well. This means washing with a degreaser if necessary before sanding, priming, and painting.
Which Primer and Top Coat
For cabinets, alkyd undercoat is a good general purpose primer that will provide a good base for finish enamels and help to ensure your new paint lasts a long time. If you're working with simulated wood, which is usually some type of plastic, use a shellac-based primer-sealer instead of alkyd to improve bonding. If you're painting your cabinets a color other than white, tinting the primer to closely match the finish color will make coverage easier and may make it possible to get away with just one finish coat. Finish coat with an oil or alkyd-based enamel. Don't use latex for this project, it will not be durable enough and will scratch off in no time.
What You'll Need
#1 - Prep the Cabinets
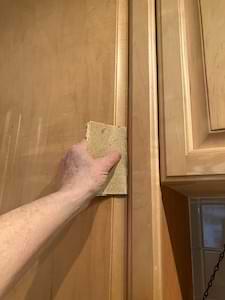
Determine if your cabinet finish is real wood, simulated wood or some other material such as MDF. Lightly sand natural wood, metal, and MDF with 120 sandpaper and wipe all dust from the surface with either a rag dampened with mineral spirits or a tack cloth. Prime with alkyd primer and let it dry for at least 12 hours before sanding lightly with 220 sandpaper. Wipe off all dust before finish coating.
Don't sand simulated wood, instead wipe it thoroughly with denatured alcohol before applying a shellac-based primer. Let the primer dry for an hour or more before finish coating with an oil-based paint. Don't sand the primer before applying the finish paint, just dust the surface off if necessary and top coat right away.
If you're only doing the outside of your cabinets and you don't mind paint on the hinges, you can do this project with the doors in place. Remove the handles to keep them clean, and use a small screw driver in the handle holes to move the doors while working. If you're doing the insides of the cabinets or you don't want to mess up the hinges, you will want to remove the doors and the hardware before beginning.
Take the hinge screws out from the cases first and then remove the hinges from the doors. Next remove the door handles. If you have lots of screws to remove, using a power drill/driver will lighten the load. If the hardware is dirty or has old paint stuck on it, you can soak it in a bath of acetone or lacquer thinner to clean it up before putting it back when you're finished with the painting. You may want to apply a new coat of clear varnish to hardware before installing it if the soaking removes the original finish.
#2 - Paint the Doors
To apply primer and paint to kitchen cabinets use a sash brush and a small sausage roller with about a ½in nap. Do the corners and edges first with the brush and then use the roller to paint the wide spaces.
Starting with the doors, remove the hardware and lay them out on a drop cloth or newspaper with strips of wood or dowels underneath to elevate them slightly. It's easier to work on one side of the doors at a time, priming and then finish painting before doing the other side. Be careful to clean up runs on the underside before leaving them to dry. To improve results and minimize the chance of marring the finish, do the face of the doors last so they will go undisturbed until completely dry.
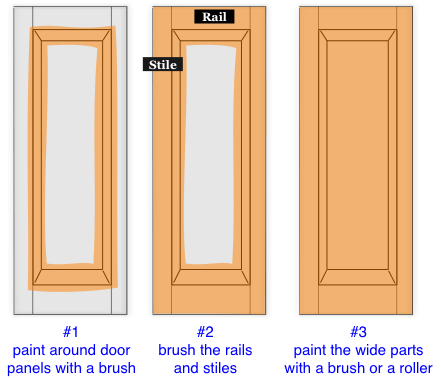
If your cabinet doors have raised-panels, use the brush to coat the corners and other intricate parts and then use the roller to do the panel if you want to. Otherwise you can brush the panels if they are rather small. If the doors are flat, without any crevices just use the roller over the whole thing. Go over the surface several times, rolling back and forth to get a smooth, even coat before leaving it to dry.
Let the doors dry for at least 12 hours and check the finish for good coverage. If another coat is needed, sand very lightly with 220 sandpaper and wipe the dust away with a tack cloth before applying a second coat. Watch for runs on the underside and wipe them out with the brush before leaving the doors to dry.
When they're completely dry, flip the doors over to do the other side. As you work watch for runs on the underside and wipe them off with a solvent soaked rag being careful not to mar the finish. Prime and apply as many coats of finish paint to the second side as needed to get good coverage. Let the final coat dry 12 to 24 hours before installing the hardware and hanging the doors back on the cases.
#3 - Brush Inside the Cases
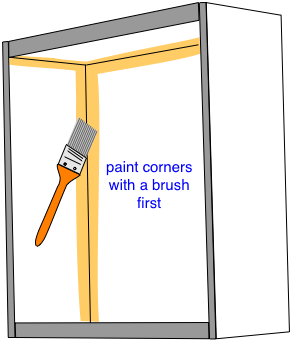
Brush the paint into the corners inside the cabinet cases and around any shelves that aren't removable. Do all the corners along the sides, bottom, and top before doing the rolling. Don't try to cover completely with the first coat, if coverage is a problem it's better to do two thin coats rather than trying to cover with one thick one.
#4 - Roll Inside the Cases
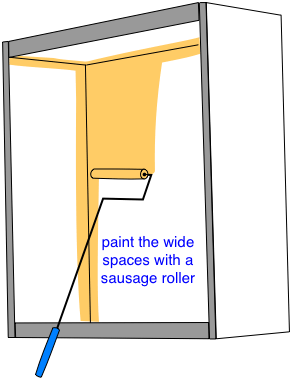
Immediately after brushing go back and roll the wide spaces. Let the roller overlap and bump at the corners to blend and smooth the coat but be careful not to leave big blobs in the corners.
Don't overfill the roller to avoid roller marks and work the paint back and forth repeatedly to get a smooth, even coat. If necessary go back and wipe out any blobs in the corners with the brush, before leaving the case to dry. Also, check for runs under the edges and brush them out if necessary.
#5 - Paint the Outsides
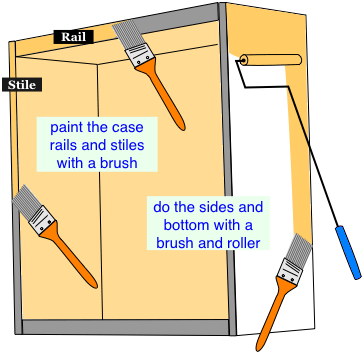
While the inside is drying, do the outside of the cases. Brush around the rails and stiles of the cabinet faces, doing the rails first and then the stiles along the sides to blend the two part together smoothly. If you're painting under the cabinets, do that part next, brushing the corners and up next to the wall and rolling the wider parts. If you're doing shelve and they can be removed, lay them on a drop cloth and paint them using the same technique used for the doors.