How to Skim Coat Walls and Ceilings
by: Dale Cox
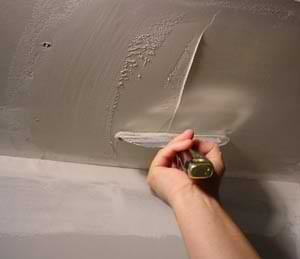
Skim coating is the process of applying a very thin covering of joint compound, also called mud, to smooth out rough wall and ceiling surfaces. This can involve the application of a single coat of mud to hide minor imperfections or it can involve the use of several coats to build up a smooth, finished surface. In addition, skim coating can be done over a small area or it can be done over an entire wall/ceiling surface. Check here for a video demonstrating how to apply a skim coat and here for a video demonstrating how to mix setting-type joint compound.
About Skim Coating Compounds
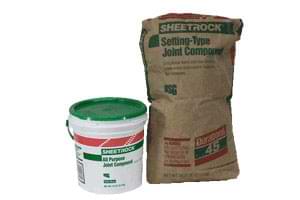
There are two types of joint compound that can be used for skim coating: setting-type joint compound and ready-mixed joint compound.
Setting compound is a powder that sets to a very hard finish when mixed with water, similar to the way concrete sets. It comes in setting rates of a few minutes to an hour or more. Ready-mixed joint compound comes wet and ready to use out of the bucket. It takes several hours to dry and is soft compared to setting compound.
Which compound to choose depends on the surface to be skimmed. For most major damage, the best choice is setting compound. This would include any water-damaged plaster or drywall, and very rough surfaces like drywall textures that will require several coats of mud to smooth out. Use a relatively slow setting compound like Durabond90® for big jobs like this.
Use ready-mixed compound for finishing drywall and for minor wall imperfections requiring one or two coats to cover. Ready-mixed is also good for the final coat over any skim coating job. It's easier to spread than setting-type, allowing for a thinner application and it's soft, making a smooth finish easier to achieve when sanding.
Wall Preparation for Skim Coating
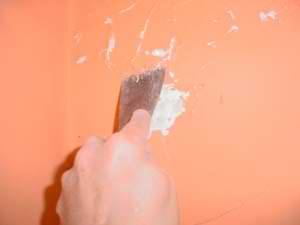
Skim coating can be done over most paint finishes with no special preparation. As long as the surface is ready for repainting, it will also be ready for skim coating. However, if the surface has been damaged, exposed to water or if you have a very shiny paint to cover, some preparation will be necessary to ensure no bubbling develops in the finish when you're done.
Before skim coating:
- Make sure the surface is clean. Use a degreaser to wash painted surfaces that are stained or covered with an oily film.
- Sand slick, shiny paint surfaces with medium sandpaper to scuff them up a bit or prime with a flat paint and let it dry completely to dull the shiny finish.
- Repair any water stained surfaces and seal them with primer-sealer before skim coating.
- If the paint is peeling or plaster and joint compound are popping off, remove all the loose material, wipe away all dust, and coat with primer-sealer. Repair the damage as needed and finish the repair with a few skim coats to smooth the surface.
Mixing Setting-Type Joint Compound
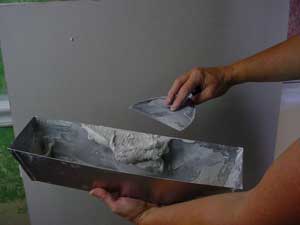
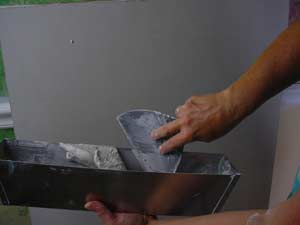
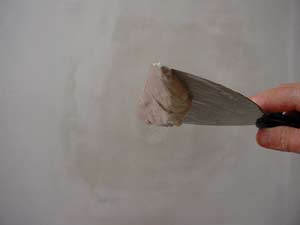
Use a mud pan to mix small amounts of mud at a time for skim coating. Use a 2 to 1 ratio of powdered compound to cool, clean water. To be sure you can use the mud before it sets, start with about a cup of powder.
Add about a half cup of water and mix the mud so it's thick enough to remain on a joint knife when held upside down. If your mixture is too thin and soupy, add a little more powder until you get the right consistency. This type of joint compound will set quickly, so use it right away.
Collect the wet mud onto one side of the pan, scooping it up with the knife and scraping it onto the rim. This will help to keep it under control and avoid spreading it to unwanted areas which can create a mess and make it harder to get a smooth finish.
Transfer the mud to the work surface by "cutting" a portion from the rim of the pan, and then spreading it back and forth like buttering a piece of toast.
Note: After powdered compound sets for a few hours it will be hard to remove from tools, etc. To avoid the extra cleanup later, scrape off the hardened mud right away. Use a razor-blade glass scraper or putty knife to shave the set mud from the pan and joint knife into a trash container. Don't wash it down plumbing drains, it will set in the pipes and cause a clog.
Apply the First Skim Coat
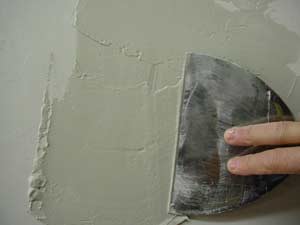
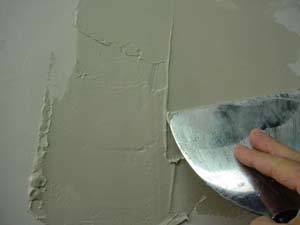
Apply a thick coat of mud, holding the knife at about a 30° angle to lay it on 1/8 to 1/4 inch thick. Cover the whole area to be skimmed and let the mud overlap onto the surrounding surface.
Immediately go back and "skim" the excess mud from the surface. Hold the joint knife at a 30° angle and press down hard as you pull it in one complete stroke, from one side of the area to the other. Return the collected mud to the rim of the pan. Skim off the remaining excess mud with parallel stokes, leaving a consistently thin layer behind. Ignore small ridges between strokes as you go, you can remove them later after the compound has set.
Between each stroke, be sure to scrape the excess mud from the knife blade back onto the rim of the pan. Keeping the blade as clean as possible will make the job easier and improve the results.
Apply a Second Skim Coat
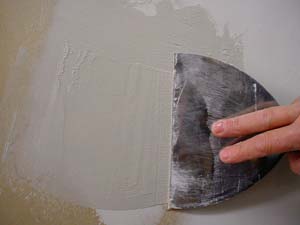
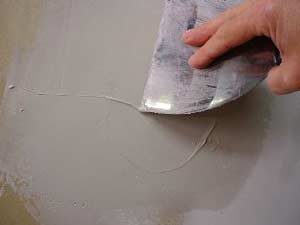
When the mud sets, scrape off any ridges using the joint knife in upward strokes and lightly sand with medium grit sandpaper. If there are a lot of ripples, bumps or other protrusions on large areas, use a sanding block or pole sander to go over it lightly. Vacuum up dust and lightly wipe the whole area with a damp cloth or sponge before applying a second coat.
To apply a second coat use the same technique of buttering and skimming used with the first but this time remove the mud stroking in a perpendicular direction. If your first coat was applied horizontally, stroke vertically with the second coat. This will help to level the surface by filling any ripples and other irregularities in the first coat. Allow the mud to set and dry completely before proceeding.
Apply as many subsequent skim coats as needed to build a smooth finish over the repair area. As you work, if there is excessive rippling or other surface imperfections, sand them lightly and wipe the dust away with a damp rag before applying another coat. Always alternate the direction of your strokes with each new coat, and always clean the blade off on the pan after each stroke.
How to Skim Coat a Whole Wall or Ceiling
Skim coating an entire wall or ceiling will require plenty of time to work before the mud gets hard. To avoid problems, use ready-mixed joint compound for large areas whenever possible. If you need to fill in a thick texture on a large area, use setting compound to make the deep fills and build up the finish and then use ready-mixed for the last couple of coats.
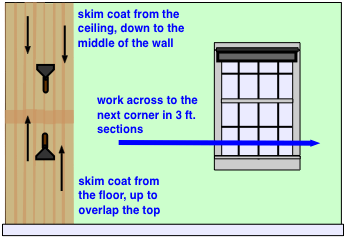
To skim a whole wall, work on a manageable swath of a few feet at a time. Working from the ceiling to about midway down the wall, apply the mud with back and forth strokes and immediately skim off the excess working from top to bottom.
Next, move down and work from the baseboard up to the midpoint. Skim stroking up to overlap the top part a bit and blend the two parts together. Work in small rows like this, across the wall to the next corner.
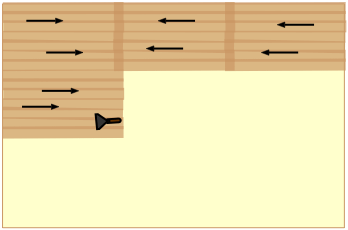
On ceilings work across in 3 or 4 foot rows, breaking each into manageable sections. Work all along one wall and stroke back into the previous section to overlap and blend with the new section.
When you reach the other side of the room, start a second row across the ceiling working parallel with the first. Blend the mud together along all edges as you go. If after you're done, a second coat is needed over the whole ceiling work perpendicular to the first coat to aid in leveling the overall finish.
Sand the Final Coat
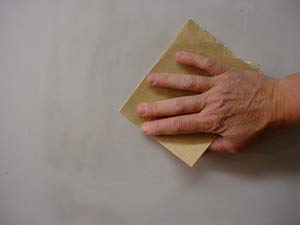
When you've built up the surface so it's fairly smooth, allow the final coat to set and dry completely. If you're using ready-mixed compound it's best to leave it to dry overnight but setting mud can be sanded in a couple of hours.
Use 120 sandpaper for setting compound and 220 for softer, ready-mixed compound. Sand with light pressure in wide, arching strokes to remove any small bumps and ridges over the surface. Feather the edges of the mud so it blends smoothly into the surrounding surface.
Use a sanding pole to sand a whole wall working from the ceiling down to the floor and across to the next corner. Sand ceilings using a sanding pole working along one wall and then out toward the other side of the room.
Vacuum up the dust and wipe lightly with a damp cloth or sponge to remove all the residue from the surface before priming and painting. If you are using flat latex finish paint, it will be self-priming. If you are using semi-gloss or other shiny finish, prime with flat latex paint or a latex primer first.